Go 代码文档化的设计
为代码写文档是一件非常重要但同时又是一件常被程序员轻视的事情。Go 代码的文档化相当简单:
-
文档和代码位于一起
写代码的同时也可以写文档,这可能是写文档最简单的方式之一;
-
使用 godoc 生成文档
godoc 是一个命令行工具,可以将源码中的文档提取出来生成一定形式的 HTML 页面(或者只是纯文本)。用户可以通过 godoc 提供的 Web Server 来浏览文档;
-
使用非常简单的文档规则
Go 只使用非常简单的代码注释(即 // …)来实现代码文档化的功能。其他编程语言的文档生成工具,比如 Java 的 Javadoc、Python 的 Docstring、C 系的 Doxygen 等,都有着相对复杂的文档注释规则,本质上就是一种内嵌的标记语言;
如何为 Go 代码写文档
注释规范
为 Go 的类型、变量、常量、函数和包写文档,只需要遵循一个 convention 即可:将注释放置于语法体声明之前(且中间不可有空行)。
比如 fmt 库中的 Fprint(),其注释是这么写的:
1
2
3
4
|
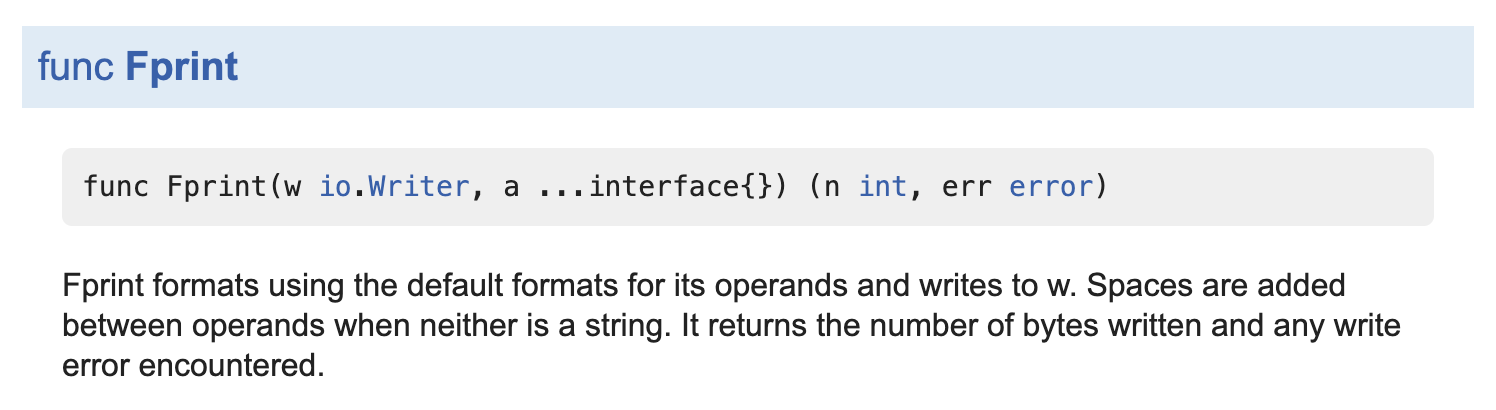
// Fprint formats using the default formats for its operands and writes to w.
// Spaces are added between operands when neither is a string.
// It returns the number of bytes written and any write error encountered.
func Fprint(w io.Writer, a ...interface{}) (n int, err error) {
|
Fprint() 上面的注释最终会形成一个完整的句子被 godoc 展示,如下图所示:
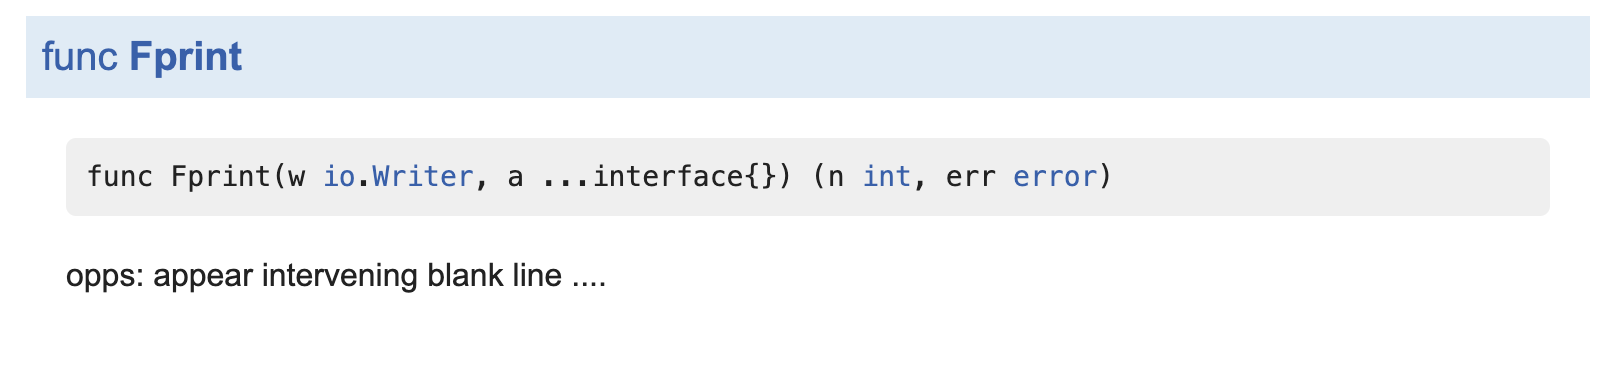
如果注释中出现了空行,那么空行前的注释将不被作为文档,例如:
1
2
3
4
5
6
7
8
|
// Fprint formats using the default formats for its operands and writes to w.
// Spaces are added between operands when neither is a string.
// It returns the number of bytes written and any write error encountered.

// opps: appear intervening blank line ....
func Fprint(w io.Writer, a ...interface{}) (n int, err error) {
	return
}
|
这样生成的文档为:
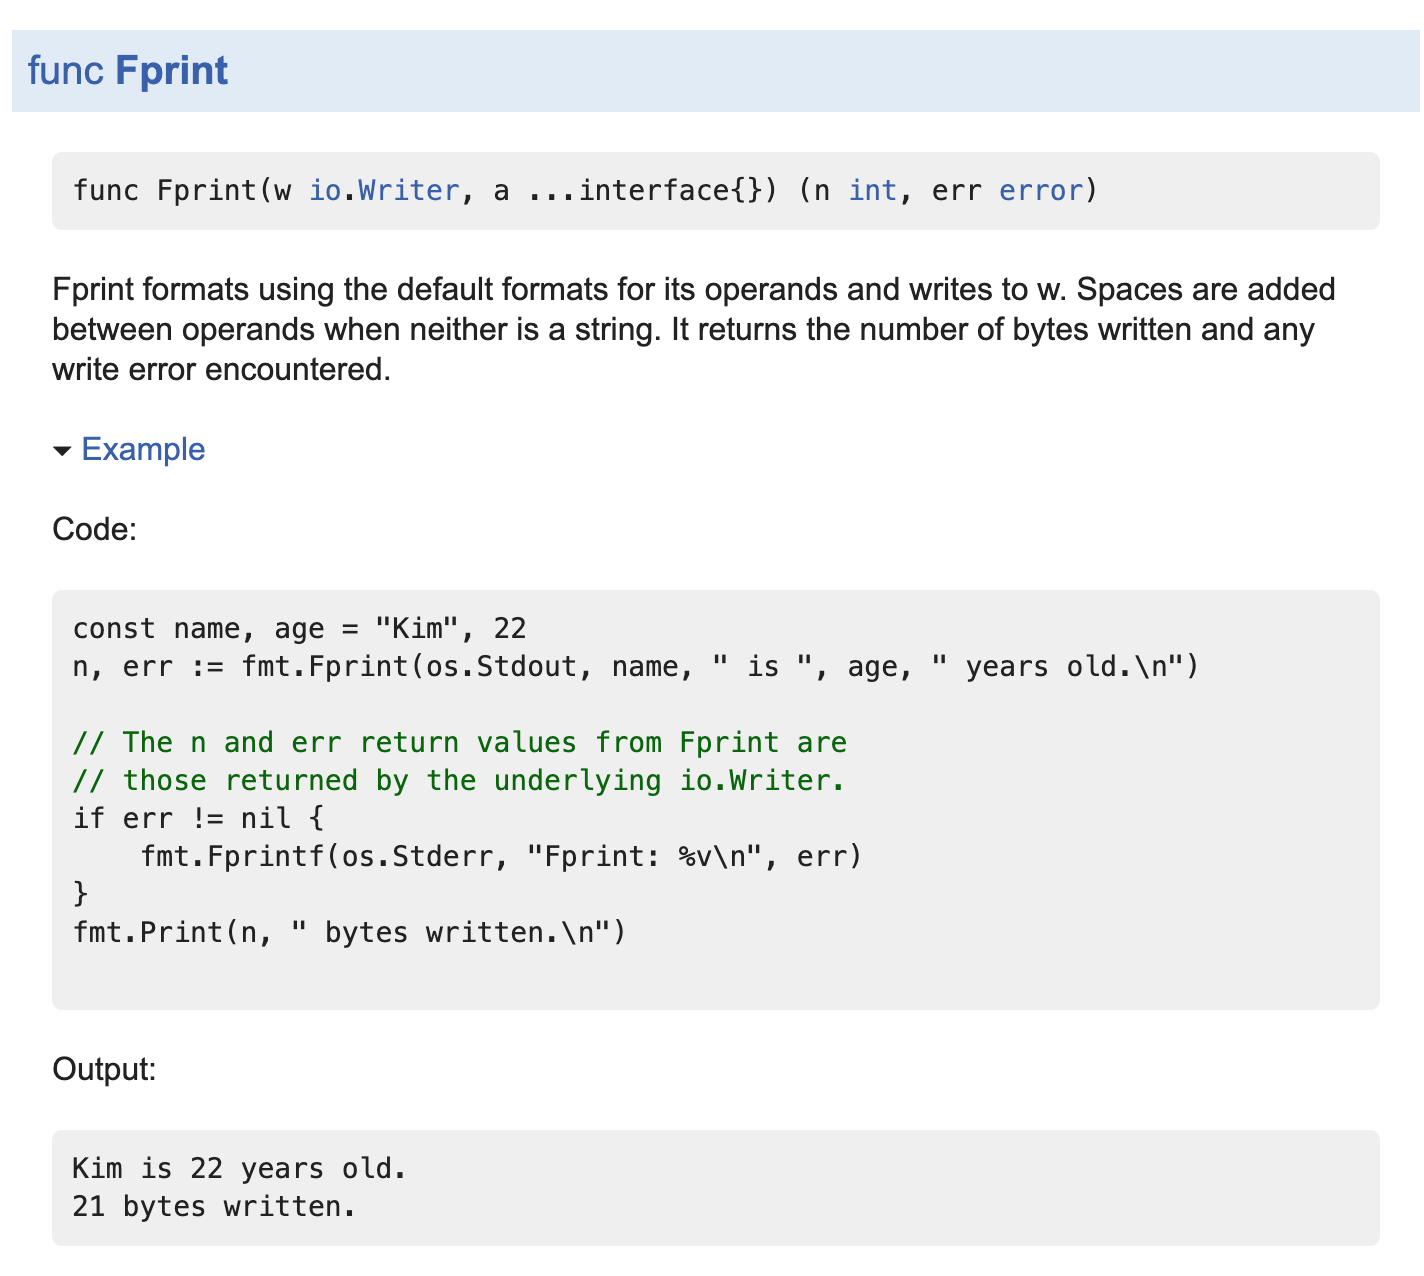
如果在单元测试中出现了 Example 代码,godoc 也将会将其展现出来,比如:
 1
 2
 3
 4
 5
 6
 7
 8
 9
10
11
12
13
14
15
16
17
|
package fmt_test

func ExampleFprint() {
	const name, age = "Kim", 22
	n, err := fmt.Fprint(os.Stdout, name, " is ", age, " years old.\n")

	// The n and err return values from Fprint are
	// those returned by the underlying io.Writer.
	if err != nil {
		fmt.Fprintf(os.Stderr, "Fprint: %v\n", err)
	}
	fmt.Print(n, " bytes written.\n")

	// Output:
	// Kim is 22 years old.
	// 21 bytes written.
}
|
这时候 godoc 将为其渲染成:
包的注释
对包的注释一般会比较简短,比如:
1
2
3
|
// Package sort provides primitives for sorting slices and user-defined
// collections.
package sort
|
最终将渲染成 Package 的 Overview:

注意,一般对包的注释只需要在一个文件说明即可,如果有多个文档同时都对包做了注释,则此时 godoc 会按照文件的命名顺序将对应的文档都组合成 Overview。对包的第一句注释将作为对包的简介被 Synopsis 展示:

如果对包的注释非常长,此时可以使用 doc.go 机制:即在当前包目录下创建 doc.go,将注释写入这个文件中(最后要带上对包的声明):
1
2
3
4
5
6
7
|
/*
	Package fmt implements formatted I/O with functions analogous
	to C's printf and scanf.  The format 'verbs' are derived from C's but
	are simpler.
	...
*/
package fmt
|
在 doc.go 中,我们可以使用 /*...*/ 方式的注释,并且不同的缩进模式将会渲染出不同的效果(大小标题、不同的章节、代码块等)。
标记 Bugs 和 Deprecated
在注释中,我们可以使用 BUG(who) 来标记某些已知的问题,这部分注释将在渲染出的 Bugs 章节中显示,比如:
1
2
3
4
5
|
// Title treats s as UTF-8-encoded bytes and returns a copy with all Unicode letters that begin
// words mapped to their title case.
//
// BUG(rsc): The rule Title uses for word boundaries does not handle Unicode punctuation properly.
func Title(s []byte) []byte {
|
最会将渲染成:
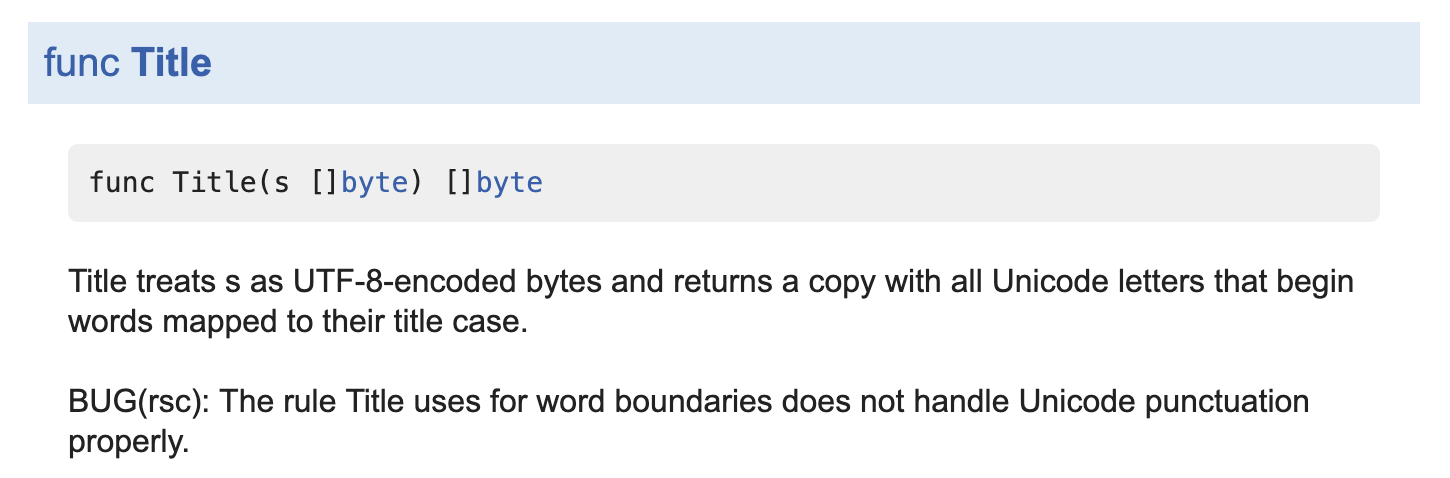
并在生成页面的最下方有一个 Bugs 章节:

如果有常量、结构体字段、类型甚至整个包不建议被进一步使用,我们可以使用以 Deprecated: 开头的文档注释:
1
2
3
4
5
6
|
// FileHeader describes a file within a zip file.
// See the zip spec for details.
type FileHeader struct {
    ModifiedTime uint16 // Deprecated: Legacy MS-DOS date; use Modified instead.
    ModifiedDate uint16 // Deprecated: Legacy MS-DOS time; use Modified instead
}
|
但是奇怪的是,godoc 并没有为此生成特殊的页面,只是作为一个简单的标记(比如方便搜索)。
Godoc 的使用
godoc 的使用简单,通常只需要执行:
则会创建一个监听在 6060 端口的服务器,我们可以用 Web 浏览器直接访问 http://localhost:6060/。
godoc 将会为 $GOPATH 和 $GOROOT/src/pkg 下的源代码建立文档。如果我们在 $GOPATH/src/github.com/<account>/<project>/pkg/foo 下有一个 foo 的 包,则可以直接通过访问 http://localhost:6060/pkg/github.com/<account>/<project>/pkg/foo 即可。
如果你写了一个开源项目,想自动生成 Web 页面的文档,可以使用 GoDoc。这个项目来自 gddo,可以为 BitBucket、GitHub 等开源仓库的 Go 项目生成 Web 页面文档。无需在代码仓库中使用显示的说明,只需要检索相应的项目,GoDoc 就会公开的代码仓库中相应的项目,将其抓取出来生成文档。
总结
总的来说,给 Go 代码写文档是一件比较简单的事情,当搞不清楚文档该怎么写时,找出标准代码库参考一下就行了。
参考资料